


 9:06 PM
 Afa Family


Create a cinematic Aerial Scence in Photoshop

In this this tutorial, we will create a cinematic aerial scene in Photoshop. The idea behind this was to create a dramatic scene that looked like it was from a movie. By using free stock photos and some simple techniques and graphic design rules such as perspective, lighting and overlapping, I accomplished the task. I hope you enjoy the tutorial and try it with your own stock imagery.
Inspiration: This image was inspired by 1 Peter 2:11 Dear friends, I urge you, as aliens and strangers in the world, to abstain from sinful desires, which war against your soul.
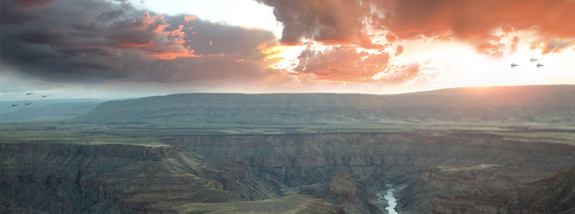
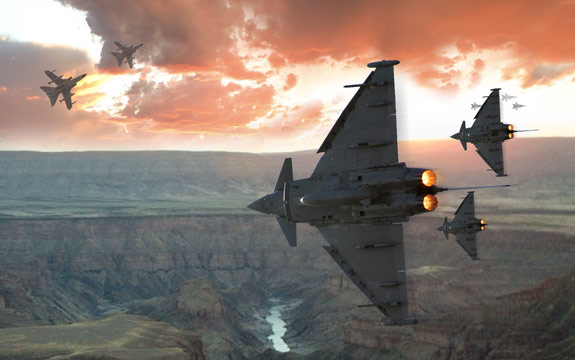
Final Image

Resource
- Canyon from Stock.xchng
- Lake Powell Sunset from Stock.xchng
- Aircraft6 from Stock.xchng
- Fighter planes at airshow 4 from Stock.xchng
- Tornado Jet from Stock.xchng
- F-15 Strike Eagle from Stock.xchng
- Eagle fighter Jet at Air Show from Stock.xchng
- Sun Flare from Wikipedia Commons
Step 1
Open the Canyon image in Photoshop.
Step 2
Lets create a more dramatic sky. Open the Lake Powell Sunset image and crop it at the horizon line.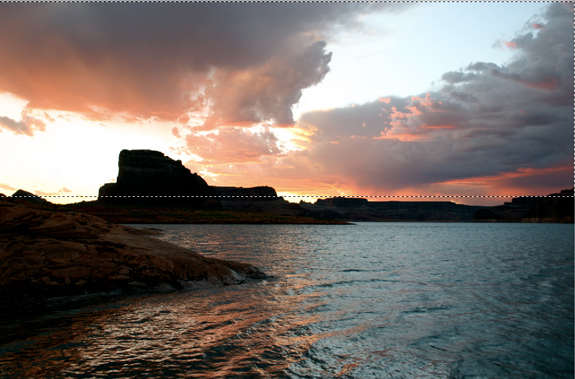
Flip the cropped, Lake Powell Sunset image horizontally, to match up with the direction of the light in the canyon image….Image > Image Rotation > Flip Canvas Horizontally.
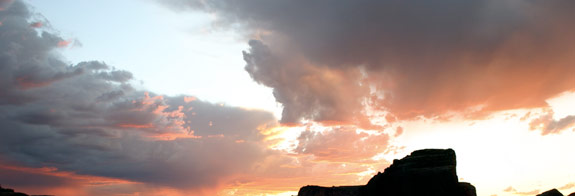
Remove the dark mountains with the clone tool.

Step 3
Copy and paste the Lake Powell Sunset image, into the canyon image, then scale the sunset to match with the canyon’s horizon. To scale click Edit > Transform > Scale and Hold down the Shift Key as you scale, to prevent the image from warping).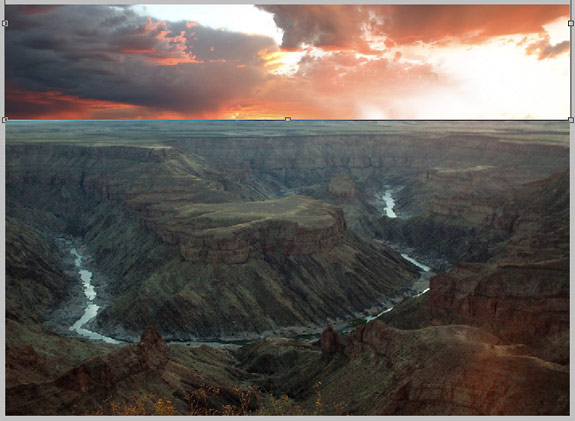
Step 4
Now we will create a mask to blend the sunset into the background. With the sunset layer still selected, click, Layer > Layer Mask > Reveal All. Take a medium sized paint brush, with black as your foreground color and start brushing out the areas below the mountain.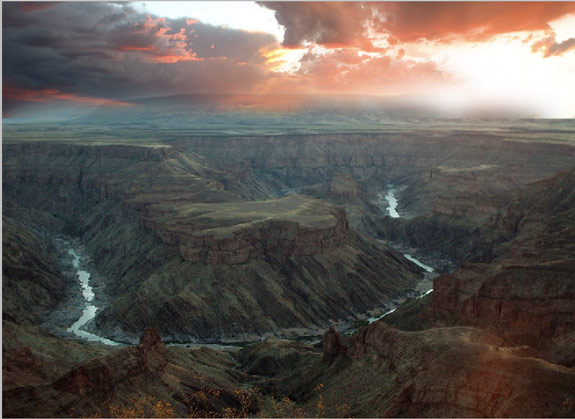
Switch between small and medium brushes until you have something like the image below.

Step 5
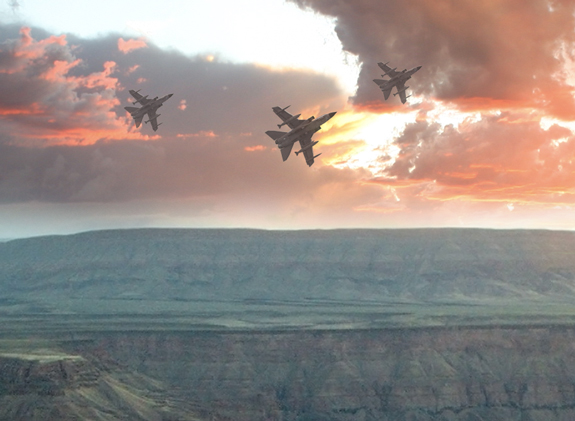
Lets start adding some background action. Open the Eagle fighter Jet at Air Show. Extract it’s background with the Magic Wand tool.
Copy and paste the Eagle Fighter into your scene, flip it horizontally and scale it down really, really small.

Position your Eagle fighter to the left of the composition, reduce the opacity to 35%, then rotate it upwards about 20%. Duplicate the layer to make the other jets.

Step 6
Repeat the same process in Step 5 with the F-15 Strike Eagle.
Position the F-15 Strike Eagle on the right side of your composition with a 48% Opacity.
Step 7
Now that we have some background action going on in the distance, we can pull the action closer to the camera by creating some middle ground action. Open the Tornado Jet image and extract it from the background with the magic wand tool.
Reduce the saturation (Image, Adjustments, Hue/Saturation ) to -72, then change the hue to +148

Copy and paste the Tornado Jet into your scene, scale and reduce it’s opacity to 70%-80%. Duplicate the Jet and arrange them in your scene.
Step 8
Now we will start to create some foreground action with some menacing looking fighters, these Fighters will be the focal point of our image. Open the Fighter planes at airshow 4 . Select and delete the sky with the Magic Wand Tool.
Copy and paste the Fighter into your document.
Fix the levels on the Fighter to match up more closely with the lighting in the scene. Image > Adjustments > Levels.

Resize the fighter about 45%. Edit > Transform > Scale.

Step 9
Create a motion blur for the fighter. Duplicate the fighter layer, then add the motion blur to the duplicated layer. Filter > Blur > Motion Blur.
Move the blurred layer slightly to the right and reduce it’s opacity to 30%. Use a soft medium size eraser brush to erase the areas of the blur in the front of the fighter.
Group the Fighter and the blurred layer. Make duplicates, making sure to overlap one of them over the smaller planes in the background to give that extra sense of distance.
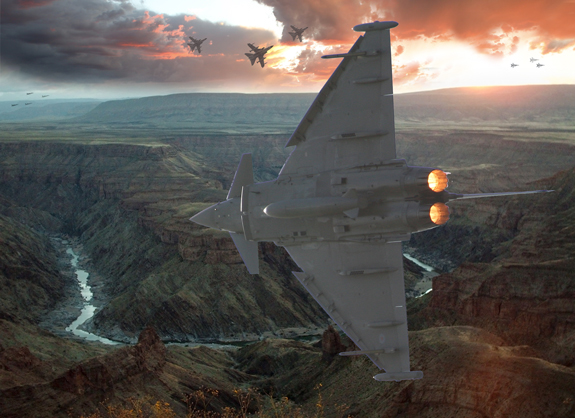
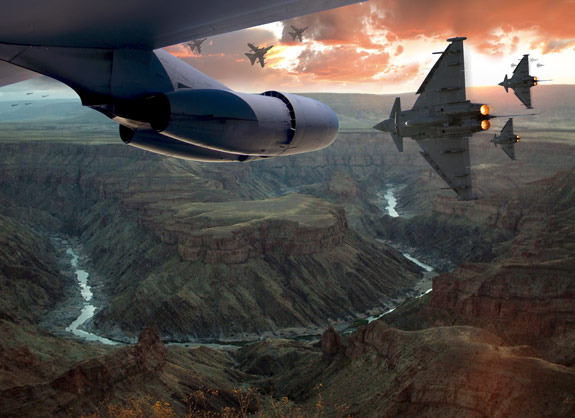
Step 10
Now we will use a large plane to bring us right inside of the action. Open the Aircraft6 image and use the Magic Wand Tool and Shift click to remove as much of the background as possible.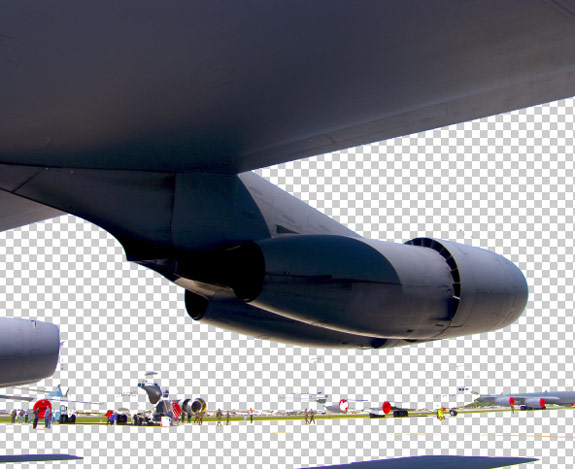
Use the Polygon Lasso Tool to select and delete the remaining areas.

Copy and paste the large Aircraft into your scene, re-size the Aircraft and position it like the image below.
Step 11
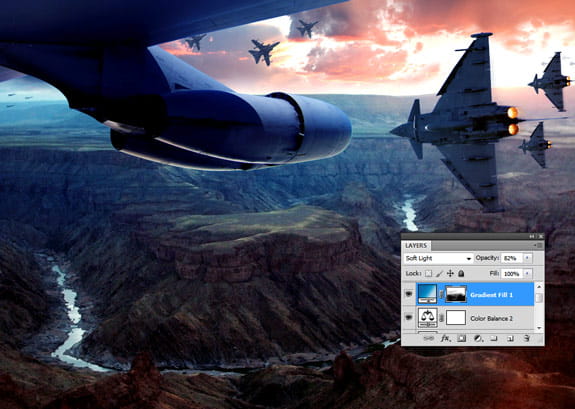
Now that we have a nice balance of aircrafts in the image, lets start blending everything together with some lighting techniques, we will use Adjustment layers. Add a Levels Adjustment layer. (Click the half moon symbol on the bottom of the layers palette, and choose Levels). Adjust the levels until you have something you like or use my settings: 28, 1.16, 229
Add a Curves Adjustment Layer, adjust the curves so that the foreground is darker than the background.

Add a Color Balance Adjustment Layer, make adjustments to the colors to match up with the color of the sunset, Cyan +29, Magenta +13, Yellow +15.

Add another Color Balance Adjustment Layer, I used this layer to add a purple tone to the image. Cyan +48, Magenta +37, Yellow +62.

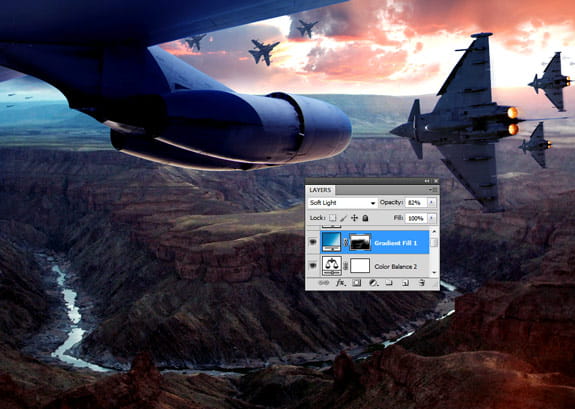
Next add a Gradient Adjustment Layer Color 1 # 066caa, Color 2 #008fc7, Color 3 #c1dbe8

Change the Layer option to Soft Light and the Opacity to 82%.

Now there is too much blue in the image. To fix that, we will paint the mask for the Gradient with Black. Change your foreground color to black, then click on the mask for the gradient and start brushing away those areas towards the foreground of the image.

Lower the opacity of the brush to 31% as you move further to the back of the image, to create a gradual change.
Brush more of the blue until the blue color only remain in the distance. Mask the blue from the bottom of the large plane engine, to give the effect of the sunlight color reflection. ( Switch between a white or black paint brush to make minor adjustments to the Mask.)
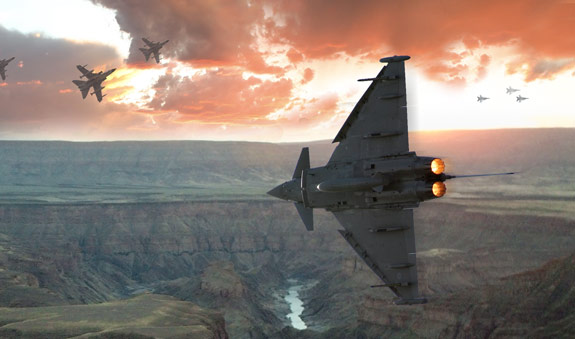
Step 12
Now we will add a bit of drama to the scene with some natural light flare. Open the Sun Flare image, copy and paste it in your psd composition. Place the Sun Flare Layer beneath all the adjustment layers.
Resize the Sun flare and change the Layer Style to Screen.

Use a soft medium size eraser brush to erase the excess edges of the Sun Flare image.

Now crop the image if you want that wide screen, cinematic aspect ratio. This will bring the action more into focus.
Final Image
Conclusion
Using a few graphic design rules, we can bring life to our compositions. Determine your background, middle ground and foreground images. Use perspective techniques to achieve the illusion of distance. Perspective is the technique of creating an illusion of depth by depicting distant objects as paler, less detailed, and usually bluer than near objects, but under some conditions may be some other color, eg., at sunrise or sunset, distant colors may shift towards red, it is always a good idea to study real life images for inspiration. Use overlapping to enhance the interaction between elements in the composition. Last but not least, always create a focal point in your compositions, eg., I used the large aircraft wing and the menacing jets to bring the eyes into the action. These techniques can be used in any graphic design or painting project.
Sumber : photoshoplady.com
 Posted in:


0 comments:
Post a Comment